Building Flappy Bird #7 – Props and Experimentation
In this post, we’ll add some props to make our game feel a little more polished.
Let’s get right to it!
Props
To get started, take the crab from the art folder and drag it to your Hierarchy.
Change the position and scale of the crab to match the image.
Take special note of the Z value “-1”. This is needed to make the crab appear in front of the ground.
Once you have the settings copied, try playing with the Z value and see how it disappears when the Z is not a negative value.

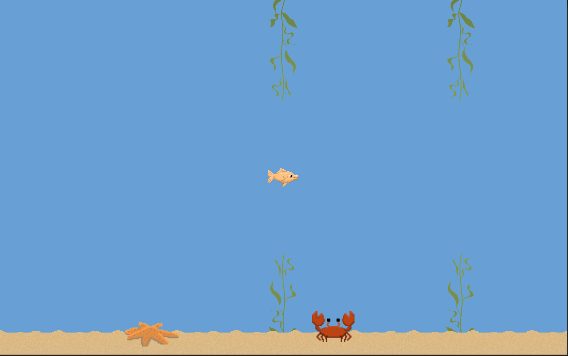
Your crab should look like this. If your crab is above or below the ground, try adjusting the Y position until it looks right.

Hit Play and watch the crab not move.
How do we move the crab???
Easy! We re-use the “MoveLeft” script from before.
Attach the “MoveLeft” script to the crab
Set the speed to 2.5

Click play again and watch the crab disappear off our screen only to reappear later.
Let’s do it again!
Let’s add another prop using the same technique as before.
Grab the starfish and drag it to the Hierarchy.
Set it’s position and scale to match these

Add the “MoveLeft” script to the starfish.
Your starfish should look something like this.
If your starfish is above or below the ground, try adjusting the Y position until it looks right.

One Last time…
If you were looking around in the art folder, you may have guessed, we still need to add the clam.
Drag the clam to your Hierarchy.
Set it’s position and scale to match these

Add the “MoveLeft” script to the CLAM.
Now it’s time to play! Give your game a test run and make sure the Crab, Clam, and Starfish are re-appearing properly.
If you played, you may have noticed a bug in our game.
When the props re-appear on the right side of the screen, they’re going to a random height.
To fix this, we need to add an option to our “MoveLeft” script.
Change your “MoveLeft” script to match this
using UnityEngine;

public class MoveLeft : MonoBehaviour
{

  [SerializeField]
  private float _speed = 5f;
  [SerializeField]
  private bool _randomizeHeight = true;

  // Update is called once per frame
  void Update()
  {
    transform.Translate(Vector3.left * Time.deltaTime * _speed);
    if (transform.position.x < -15)
    {
      if (_randomizeHeight)
      {
        float randomYPosition = UnityEngine.Random.Range(-3, 3);
        transform.position = new Vector3(15, randomYPosition, 0);
      }
      else
      {
        transform.position = new Vector3(15, transform.position.y, 0);
      }
    }
  }
}
Now, on your Clam, Starfish, and Crab, uncheck the Randomize Height option in the Inspector.

Play again and you should see your props preserving their Y position.
Save your Scene
It’s time to save our scene. Select File->Save Scene As

Browse to the Scenes folder
Give your scene a unique name, or copy mine.

You can verify that your scene is saved by looking in the Scenes folder.

Now repeat this process to save our experimental scene.

Your scenes folder should now look like this

The top left area of the unity application bar shows the name of the currently loaded scene.

Great work so far, now it’s time to have a little fun and get creative!
Experiment
ctrl/cmd-s will save the currently opened scene
For this part, I want you to add some more props and place them where ever you like.
Spend 5 minutes trying things out.
Play with their scale, position, and rotation until you get something YOU LIKE.
Come back once you’re happy with your changes.
Now SAVE your scene so you don’t lose that customization.
Optional
If you like, you can even find some external art.
One of the easiest places to use is google images.
Just make sure that you select “Transparent” for the “Color” when searching.
If you don’t see Color, click the “Search tools”

To download an image from google images, just click on it to get the full art view, then right click and hit “Save image as…”

Next Up: Scoring
In the next post, we’ll add an interesting scoring system.
You’ll get a nice introduction to the Unity3D GUI system and add a goal for your players.