If you’ve been following the site, you may have noticed the VR Baseball game. While this was an interesting project, there was one part that stood out as particularly worthy of writing about. In this article, I’ll show you how to setup physics in your own baseball, cricket, or other batting style game in Virtual Reality. We’ll use a simple trick to make the batting feel real and fun.
Video Version
The Game
In VR Baseball, the goal is simple. A ball is pitched, you swing the bat, and if you hit, the ball goes flying.
The Problem
The first implementation of VR Baseball had a very simple batting system. There was a colider on the bat and the ball had some bounciness. Choosing a level would just adjust the bounciness factor of the ball by switching out the PhysicsMaterial on the balls Collider. It was simple, it worked, but it felt weird. The main issue was that no-matter where on the bat you hit, the ball flew the same speed.
You could hit it with the handle, it’d go flying. You could push forward with the bat and get a home run off the tip. The only thing that was taken into account was the velocity of the bat at the time.
Now in most situations, you don’t need to worry about the velocity of the exact part where your collisions happen, only the general velocity of the object it’s colliding with. But with baseball, we have a swinging action, and we need the velocity at the end of the bat to be different from the velocity at the handle (just like real life).
The Solution
Instead of having the baseballs collide with the bat, we spawn some new objects to collide with.
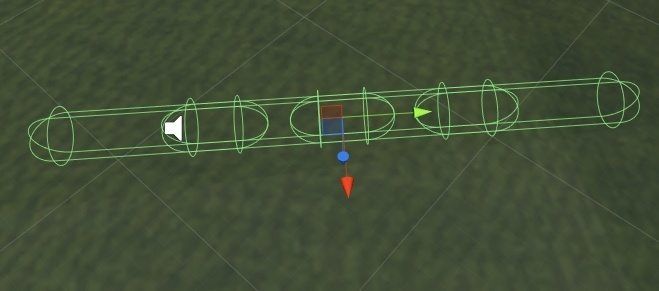
The bat has a set of child objects that determine where these new objects will spawn and be at run-time.

As you can see, the BatCapsules don’t have much to them. They’re really just a script and a transform. There’s a collider and a mesh renderer, but those are only for debugging and visualizing, which is why they’re disabled normally (I would toggle them on when the follower seemed to be in the wrong spot, so I could verify the location I was giving them was valid).
The most important part though is the “Bat Capsule” script on them.
using UnityEngine;

public class BatCapsule : MonoBehaviour
{
    [SerializeField]
	private BatCapsuleFollower _batCapsuleFollowerPrefab;

	private void SpawnBatCapsuleFollower()
	{
		var follower = Instantiate(_batCapsuleFollowerPrefab);
		follower.transform.position = transform.position;
		follower.SetFollowTarget(this);
	}

	private void Start()
	{
		SpawnBatCapsuleFollower();
	}
}
The method SpawnBatCapsuleFollower() does exactly what its name implies. It spawns a BatCapsuleFollower, and calls a single initialization method named SetFollowTarget. We pass “this” into SetFollowTarget() as we want the BatCapsuleFollower to follow this object which is attached to the bat.
The Start() method in this script does a single thing, it calls SpawnBatCapsuleFollower(). We do this so anyone reading the code later can tell exactly what we want to do, without needing comments.
using UnityEngine;

public class BatCapsuleFollower : MonoBehaviour
{
    private BatCapsule _batFollower;
	private Rigidbody _rigidbody;
	private Vector3 _velocity;

	[SerializeField]
	private float _sensitivity = 100f;

	private void Awake()
	{
		_rigidbody = GetComponent<Rigidbody>();
	}

	private void FixedUpdate()
	{
		Vector3 destination = _batFollower.transform.position;
		_rigidbody.transform.rotation = transform.rotation;

		_velocity = (destination - _rigidbody.transform.position) * _sensitivity;

		_rigidbody.velocity = _velocity;
		transform.rotation = _batFollower.transform.rotation;
	}

	public void SetFollowTarget(BatCapsule batFollower)
	{
		_batFollower = batFollower;
	}
}
The BatCapsuleFollower script is responsible for following the bat capsule…
The work for that is done in FixedUpdate(). To follow the BatCapsule, it gets the position it wants to be in, then subtracts it from the current position. That distance is multiplied by a sensitivity value that can be adjusted in the editor. For my game, I found a value of about 50 worked well. It sets the rigidbody velocity to that calculated value which makes it move toward the BatCapsule.
Next it adjusts the rotation to match the BatCapsule. If we don’t do that, it will end up sideways.
Important – Physics Layers
When setting up your BatCapsuleFollower, make sure the Layer it’s on does not collide with itself. If you don’t, the BatCapsuleFollowers will be bouncing off each other, not doing what you want.![]()
To get to the physics settings, click Assets->Project Settings->Physics
In here, you need to make sure the layer you’ve chosen for your BatCapsuleFollowers (please put them on their own layer), does not collide with itself. It should also not collide with anything other than the ball (unless there’s something else you want to hit). You can see I’ve set mine up to do exactly that.
Conclusion
With it setup like this, the BatCapsuleFollowers will move at different velocities, causing the outer most one to hit much further than the innermost. While this could be further tuned to make a real sweet spot on the bat, I’ve found that this functionality works well enough.
Project Download
https://unity3dcollege.blob.core.windows.net/site/Downloads/VR%20Baseball%20Physics.zip
Get Some Bats
A good friend of mine made the awesome bats featured here and they’re available on the asset store. If you wanna do some baseball stuff and support him, go grab one now 🙂
https://www.assetstore.unity3d.com/en/#!/search/page=1/sortby=popularity/query=publisher:20410


